


Just look what our newest contributor, Andrea, has been up to in the craft department! Read on for this fabulous sequin bracelet DIY.

I’ve loved the look of stacked sequins in jewelry for a while now. I have a long boho-type necklace that mixes metallic sequins with all sorts of funky beads to make a very unique and pretty statement, and I’ve gifted a couple sets of simple sequin bracelets for birthdays. The store I had picked up a couple of bracelets has long been sold out, and months later, I’m still dreaming of owning a set of my own. So, when I spotted loads of pretty sequins at my favorite bead shop, I decided I could most definitely make my own. Turns out, I was right, and the process and results came out better than I ever expected. Here’s what you’ll need for your own sequin bracelet DIY:

Supplies:
- Flat sequins in your favorite colors
- Unique beads or stones (try to find ones that match the diameter of the sequins as close as possible so it doesn’t wind up looking bulky)
- Elastic bead cording
- Beading needle
- All supplies should be available at a local craft store. To find a wide variety of colors sold in a single color pack, I suggest hunting online, or picking some up at your local bead/jewelry supply store, if you have one.
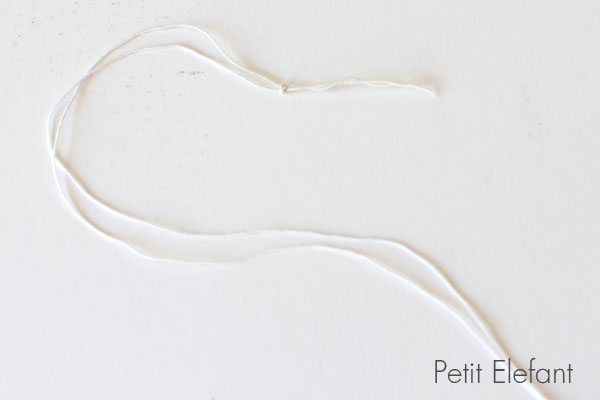 Begin by stringing your elastic cording through the needle, and tying a knot at the end of the double strand. By having a double strand to string your sequins on, this reinforces it just a bit and makes it more sturdy.
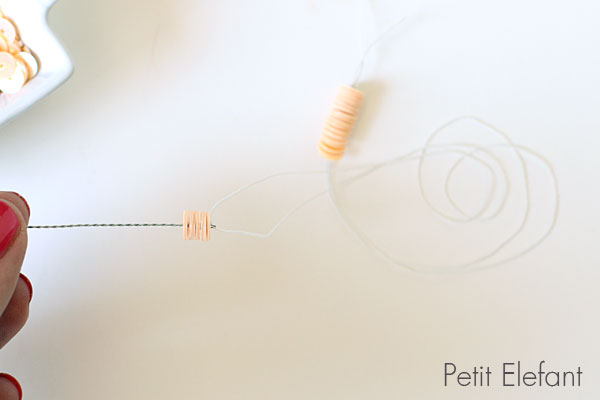
Simply begin stringing your sequins in whichever order you want. 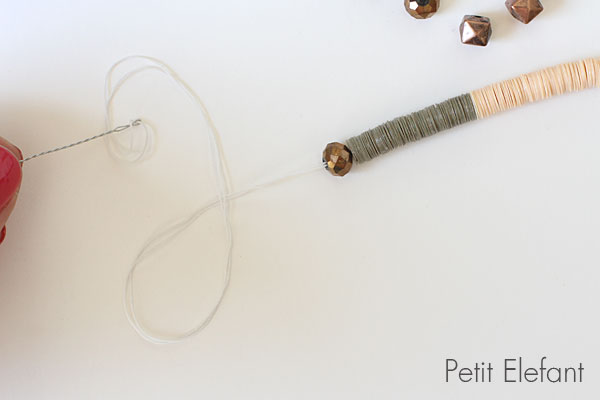
I started with the lighter color, then the darker color, added a bead, continued with the pattern, adding another bead, and then finishing off the bracelet with 2 beads where the ends will be tied.
When your bracelet is long enough to easily, yet still snugly, wrap around your wrist, cut the elastic cording off the needle and double knot the two ends together. My bracelets were each about 6 inches long. Because they’re stretchy, you don’t have to make them super long.
 That’s really all there is to it! So simple, and complete in less than 20 minutes, if you’re a speedy stringer. With the needle, I found I was easily able to string a stack of sequins at a time, making the process go much quicker.
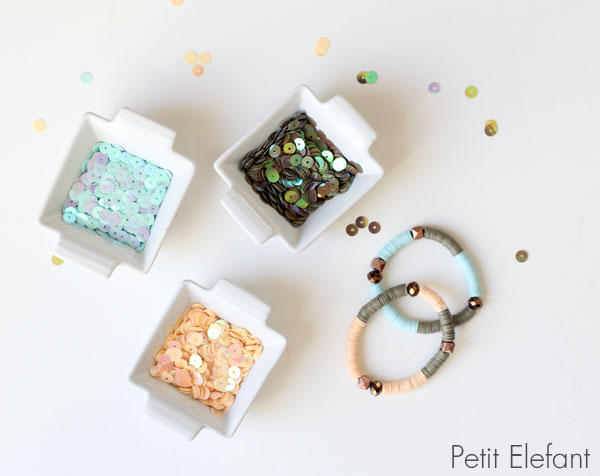
These would be great to give girlfriends, or for young tweens to make at a party. The colors make all the difference, and they can either look very young, or also very sophisticated. The perfect DIY is one that is versatile and spans generations! I think this is just that.

Andrea Howe
Andrea is the founder of For The Love Of, a lifestyle blog dedicated to approachable, modern living. She writes about style, her love of DIY, and living a healthier life through wholesome, nutritious cooking. She is also a regular contributor at Babble. You can find Andrea on Instagram @andreavhowe and @gwynethmademedoit


These look great to make! So simple and cheap to do. I’m so going to try this.
Love this idea for gifts. I have four daughters and each one of them would love one of these…and maybe keep them from taking my jewelry. Great post!