


When I started knitting my first hat, I couldn’t stop. As I saw the head taking shape I was amazed that my hands could actually do that. This is a very basic and simple pattern for a small hat. I usually have one on my needles and am building a good stash of them so I have something on hand to give out to my friends that are having babies. They are always well received.
I will add a printable PDF of the pattern by the end of the week. I will also add a similar pattern for an adult size as well. Please email me with any questions you may have while knitting this hat. lori (dot) vanwagoner (at) gmail (dot) com

SIZE
Instructions are written for 0 6 months depending on the size of your kids noggin
KNITTED MEASUREMENTS
Head circumference 16 ½ 18 (finished measurements vary depending on yarns stretchiness)
MATERIALS
1 50g ball (approx 135 yards you will use just over ½ of this ball) cotton or wool yarn that knits to standard DK tension.
One pair size US 4 double point needles
One pair size US 4 16 circular needles
11 Stitch Markers
Measuring Tape
Yarn needle
PROJECT LENGTH
Approx 3-5 hours depending on your knitting speed
NEW KNITTING TERMS
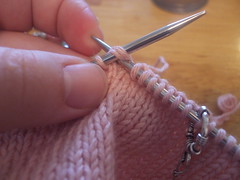
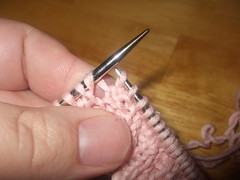
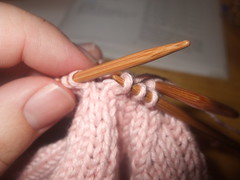
K2tog = Knit 2 together (View Photo below or view demo video here)
dps = double point needles – as you’re decreasing every other row, you’ll notice that your stitches become really spaced and start getting harder to knit. Dps help you “scrunch” the stitches together for an easier knit. You’ll need 5 dpns (this is how they come in a package), 4 to hold stitches and 1 to knit with.
KNITTING INSTRUCTIONS
Cast on 96 stitches onto circular needles.
Join round, being careful not to twist stitches
(View photos below or video demo here)
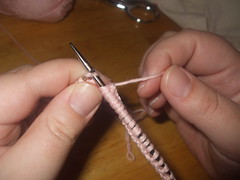
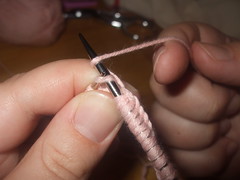


Rows 1- 6 K2, p2* (2×2 rib); repeat from * to end of rnd (measures ¾ )
Row 7 Work in Stockinette stitch (when knitting in the round this is knitting only) increasing 3 times evenly (knit 32 increase 1 stitch 3 times) (makes 99 stitches)
(View photos below or watch video here.)

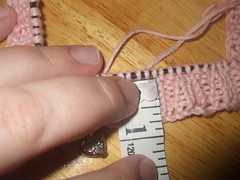
Rows 8 28 work in Stockinette stitch (piece should measure 3 ½ from beginning)

SHAPING OF TOP
Row 29 K7, k2tog, place marker*; repeat from * to end of rnd (88 stitches remaining)
Row 30 K one rnd evenly
Row 31 K6, k2tog, replace marker*; repeat from * to end of rnd (77 stitches remaining)
Row 32 K one rnd evenly
Row 33 K5, k2tog, replace marker*; repe
at from * to end of rnd (66 stitches remaining)
Row 34 K one rnd evenly
Row 35 K4, k2tog, replace marker*; repeat from * to end of rnd (55 stitches remaining)
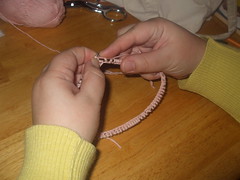
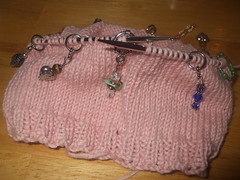
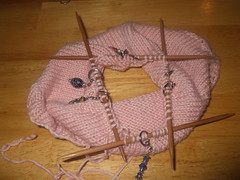
Your hat should look like this after knitting row 29 and all of the stitch markers are placed.
Row 36 Switching to DPNs, K one rnd evenly distributing 3 sections on 3 dpns and 2 sections on 4th dpn
Rather than knitting onto the right side of the circular needle, knit your stitches on to the dpn. Knit three sections on to the next three dpns, and knit the remaining 2 sections onto the forth dpn. Keep your stitch markers in place.
(Notes: I like to switch to dpns on a row that does not require decreasing just so I only have to think about one thing at a time.)
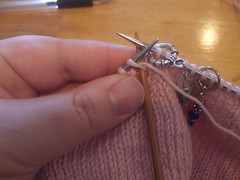
Your hat should look like this after knitting row 36 and all of your stitches are transferred to the dpns.
Row 37 K3, k2tog, replace marker*; repeat from * to end of rnd (44 stitches remaining)
Row 38 K one rnd evenly
Row 39 K2, k2tog, replace marker*; repeat from* to end of rnd (33 stitches remaining)
Row 40 K one rnd evenly
Row 41 K1, k2tog, replace marker*; repeat from * to end of rnd (22 stitches remaining)
Row 42 K one rnd evenly
Row 43 K2tog, remove marker*; repeat from * to end of rnd (11 stitches remaining)
Row 44 K one rnd evenly (reduce to 2 dpns if preferred one dpn has 6 stitches and one has 5 stitches)
FINISHING
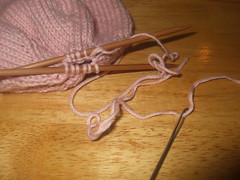
Cut yarn (about 12), leaving a tail long enough to weave in ends. Thread tail through yarn needle and pass it through each stitch (removing it from dpns), pulling tightly, and put needle through top opening.
Turn hat inside out and weave in loose ends. Cut remaining yarn tail.


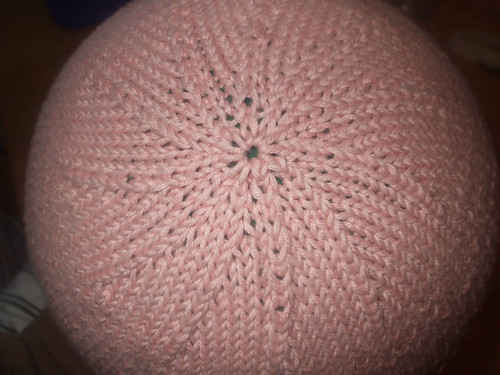
Your hat will form a nice star-like pattern at the top.
ADDITIONAL PROJECT HINTS
- Use any size of yarn needle youd like. Just make sure the eye of the needle is large enough to thread your yarn through.
- Make the brim a different color
- If your child has a taller head, increase # of rows from brim to the shaping of the top for a better fit.
- You can make the brim look anyway you’d like. If you do a strait knit for the first 6 rows, it will form a nice curled edge. If you do a 1×1 rib (k1,p1) like on the legwarmers from Tuesday, you’ll get a tighter brim. It is up to you.


Lori I can’t wait to get started! This is a great tutorial, thank you!
Great tutorial! I’ve always been to intimidated to make hats and you made it very accessible.
That’s a wonderful idea to make and keep on hand for expecting friends. I think I’ll do this so I’m better prepared for everyone who is having babies.
And I must know where you got those beautiful place markers!
Tanya – how can you be intimidated? Didn’t Norway invent knitting? Your mother is a real Norwegian knitter. :) The stitch markers were made by a friend, Kim (http://prairie-mama.blogspot.com) She also taught me to knit in the round.