Have you ever melted broken crayons? My mom used to let us dump out our huge #10 can full of broken odds + ends to melt on the griddle about once a year, and let me tell you it’s one of the highlights of my childhood.

There’s something magical about the smell of melting wax.
Well, not really.
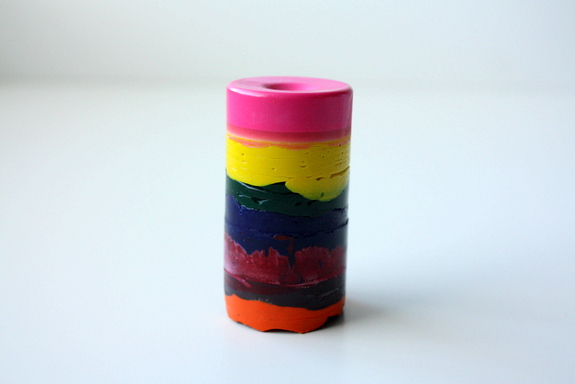
It doesn’t smell amazing, but it’s so much fun to do! And if you want, you can end up with a new crayon that looks like this. I know it’s not much to look at, but my kids sure love it.

Here are the supplies you need to make this homemade crayon happen:
- Empty containers {we used old pill bottles, natch}
- Old broken crayons
- An old or rarely used saucepan
- Paper towels or old t-shirt

Step 1:
Unwrap all the crayons and melt them one color at a time {or a bunch of colors at a time, depending what you’re going for}. We wanted to keep the colors separate because Charming and I are both O.C.D. like that. Use an old, cheap pan from a thrift store or a flimsy one from IKEA. It will stink of cheap wax, so you won’t want to use it in the future.
Melt the crayons all the way down, adding different highlights of colors if you’d like. We added a little orange to our yellow to make it more vibrant.
Pretty!

Step 2:
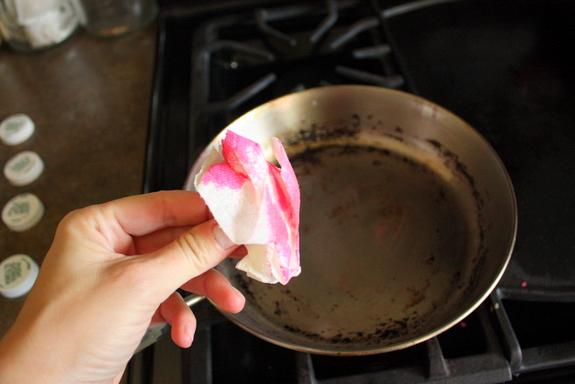
In order to have the colors remain separate, I wiped the pan with a paper towel inbetween each melting. The responsible + Eco-friendly green option is to use an old t-shirt to clear out the pan. In hindsight I see my error.

Step 3:
Pour each color, one at a time, into the container you’re using. You can use ice cube trays, or other fun shaped molds {chocolate molds work really well} to get a different effect. We were going for long skinny tubes. Once each color is poured, place the pill container into the freezer for a few minutes. We didn’t wait long enough {7-year-olds aren’t the most patient creatures} so our colors blended. If you like the blend-y look, go you!
Once each layer has cooled, melt another color and layer. Rinse + repeat.

Step 4:
Once every layer has cooled completely, and I do mean COMPLETELY, it’s time to pop out your new crayon!
Turn the pill bottle/container upside down and tap gently on a hard surface until the crayon shimmies out. I experimented with one of the bottles, using Pam cooking spray to see if it made any difference in popping the crayons out. Nope, no difference at all. Skip that step.

Step 5:
Enjoy your new crayons!
These are the perfect size for chubby little toddler and preschool hands with fewer fine motor skills than older kids, but they were great for my 1st grader as well. In the past we’ve given different sizes and shapes of crayons {made using different molds like frogs + insects} as birthday gifts accompanied with a coloring book from the dollar store.
Instant home made gifts.


Fun! I actually have a huge jar of broken crayon bits (and whole ones that lost their wrappers because it JUST WONT DO to not know the full proper name of the crayon you’re coloring with). I’ve been saving them all up because I knew at some point I would come across good instructions for reusing them. So thank you! :)
Jenni,
It’s one of those crafts that’s so much fun for YOU to do. Have fun!
Love the pill bottle shape!! I’d guess you have a few of those lying around ;)
Ahem. Yes, yes I do.
Fun project! I have done this using:
* silicone/plastic ice cube trays (cute shapes, like stars and hearts)
* old food cans (like beans and tomato sauce) for melting the crayons
Then I just put each color in its own can, stick them all in the oven, and they all melt at the same time. Pour a layer in the ice cube tray, stick in the fridge for a few minutes, take it out, add the next layer, etc. No need to pop them out after each layer this way.
Paula,
You’re so smart. I love the can idea, you clever lady.
Thanks!
I can’t wait to do this in the winter when my little people are stir crazy.
Wait about 10 minutes + it will start snowing.
How FUN!!! Cannot wait to do this with the kids!
You’ll love it when you do! Seriously.
I had totally forgotten about making your own crayons from the leftover bits. I don’t have kids of my own, but I do have little nieces and nephews and cousins… they are sure to love this!
But really… who needs kids for such a cool project? I want my own multi-colored crayon! ;)
Seriously Gina, you don’t need kids to do this. The crayons are rad and the melting is SO. MUCH. FUN.