// Learn how to make a DIY stud bracelet in today’s post from new contributor Stephanie Gerber of the blog Henry Happened. She’s wicked talented and you’ll know how-to make a DIY bracelet before you even know what hit you. //
Hi! I’m Stephanie of Henry Happened, and let me introduce myself by saying that I’m a bit of a magazine hoarder. Ever since my first subscriptions to Sassy and YM checking the mail has been one of the highlights of my day. My roommate in college (my sister) joked that I did more magazine reading than studying.
Now I’m more of a Martha Stewart and Real Simple gal with some Lucky thrown in. Do you love magazines? Which ones do you read? How often?
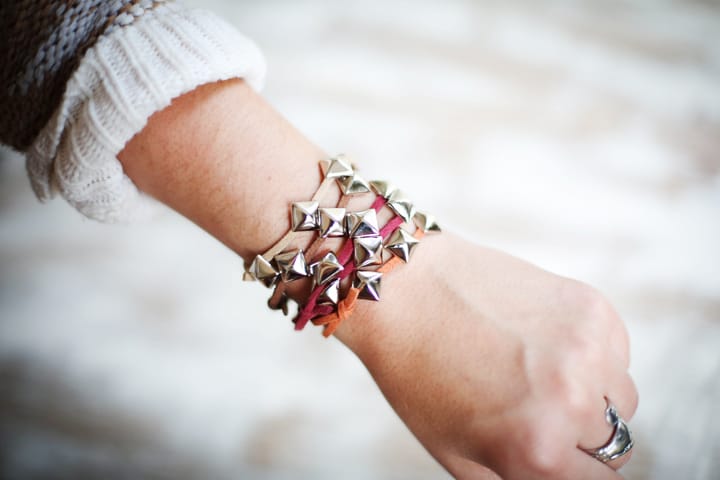
The January issues have been hitting the mailbox and after flipping through the latest fashion candy, I noticed that all of a sudden, studded bracelets are everywhere! Arm parties are still going strong so it’s time to add a simple studded bracelet to your stack.
Want to make your own? Of course you do! It’s super easy and I’ll teach you how to do it!
How to make a DIY stud wrap bracelet
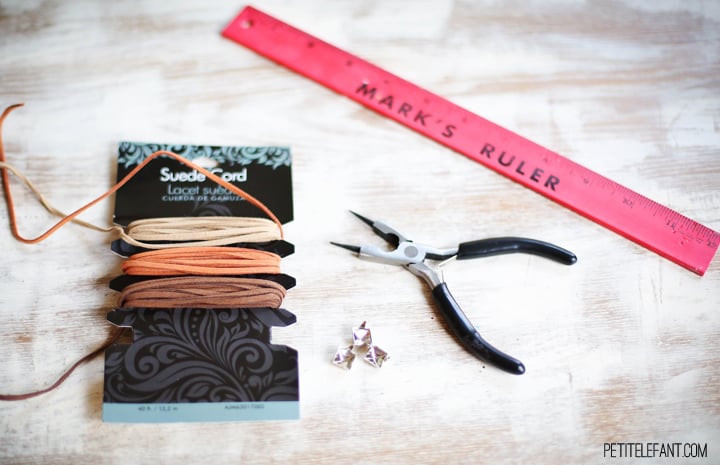
To make this DIY bracelet you will need:
- Suede cord. Mine came from Wal-Mart. Oh how I love these great fall colors!
- Small 2-prong studs. You can get little packages of these at Hobby Lobby for about $2.
- Pliers and ruler are helpful

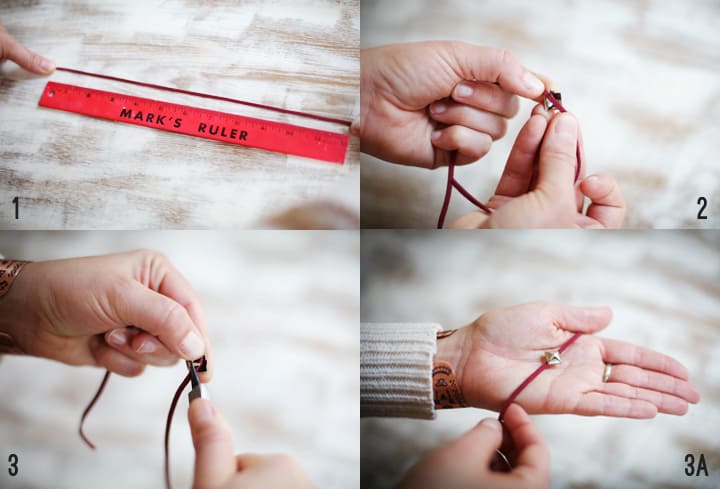
Step 1: To make the bracelet, measure about a foot of cord and cut. (Side note: Mark is my husband, and he’s kind enough to let me borrow his ruler)
Step 2 & 3: Position your studs diagonally on the cord and close the prongs. Add 2-3 more studs per bracelet, spacing them out a bit.
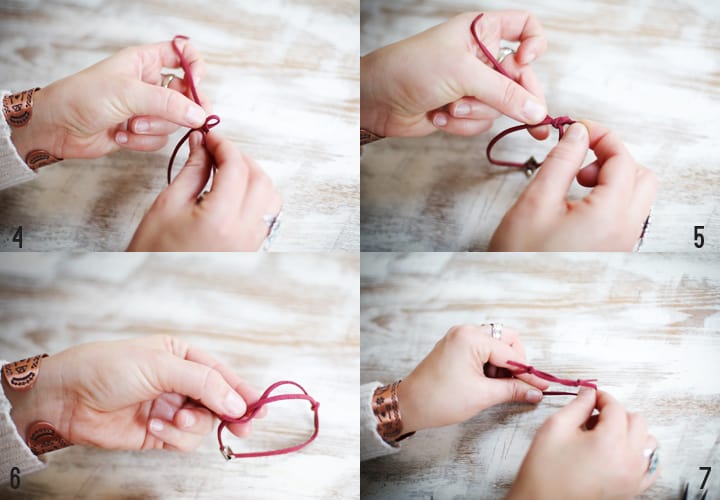
 Step 4 & 5: To make a DIY adjustable closure, knot the end of one side of the cord around the opposite cord, leaving a few inches of excess. The knot will be tight, but will still slide easily up and down the chord. Trim the tail of the knot.
Step 6 & 7: Take the excess piece of cord from the first knot and make a knot with it around the opposite side. Trim the tail of the knot, and adjust the size to easily slide onto your wrist. You can adjust the size again if needed to make a better fit once it’s on your wrist.
 Are you a fan of studs? I always feel a little more hip when wearing them. So make as many as you dare to wear – the more the better!

// Stephanie Gerber is a mother of 3 who writes for pretty mommies on a budget. She shares stylish and crafty adventures on her blog Henry Happened. //


